Sunday 31 January 2010

ISO

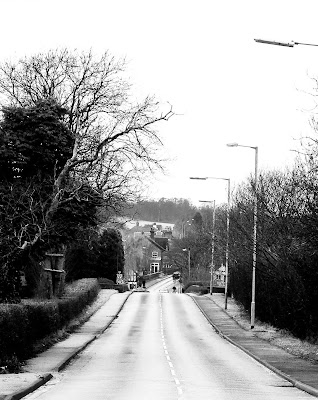
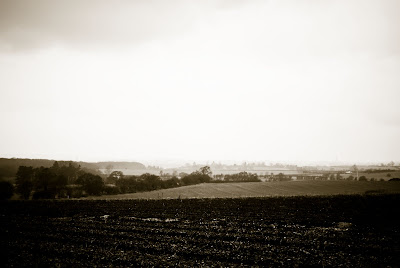
Top picture taken at; F5.6, 1.3s, at ISO 100. No Grain in the photo, its sharp.

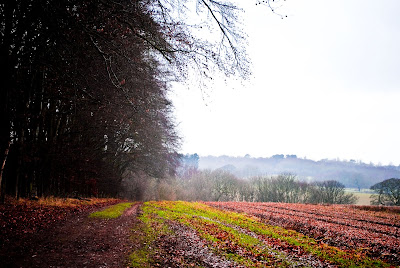
This photo was taken at F5.6, 1/13s at ISO 1600. This is as high as the ISO will go on my camera. You can see a lot more gain in this one, as apposed to the first picture. Especially in the background


F10, 1/30s at ISO 1600. Image is blown out and over exposed.

F10, 1/30s at ISO 800. Outside is over exposed, while inside the window ledge is correctly exposed.

F10, 1/30s at ISO 400. The outside is over exposed, while inside the window ledge is slightly under exposed.

F10, 1/30s at ISO 200. The outside is slightly over exposed, while inside the window ledge is under exposed.

F10, 1/30s at ISO 100. The outside is correctly exposed, while inside the window ledge is very under exposed.

ISO is how sensitive the is camera to light. The lower the ISO, the less sensitive the camera will be. This is best used when there is already a lot of light available, for example, outside on a sunny day. A higher ISO works as the opposite. The camera will be very sensitive to light, its best used when there is little light available, for example, indoors at a concert. This could enable you to take photos without the use of a tripod.
If your using a higher ISO, your likely to get more noise in your images. This causes your photos to be grainy and less sharp. In some instances the noise can add a nice texture to your image, it just depends on what type of look your going for. Noise is not very good in landscape photography, where most of the time you would like all of the image to be sharp and in focus.

The top images are to illustrate the noise you can get from different ISO settings. My camera only goes up to 1600 ISO, but you can still see some grain in the image.
The bottom images are to illustrate how sensitive the camera can be at different ISO settings. The photos were taken on a sunny day, from inside my house. I used all the different ISO settings i have on my camera.

Saturday 30 January 2010

Aperture

This is a diagram of different apertures. F2 the shutter is wide open, a large aperure. Then on the other end F16, a small aperture, the shutter is very small.


F.32


F.29


F.20


F.14


F.10

F7.1

F5.6


The aperture controls the amount of light that reaches the sensor on a digital camera. An aperture acts much like the pupil of an eye. It opens wider as light decreases to let in more available light. It gets smaller when light increases to reduce the amount of light entering the eye.
The wider you set the aperture, the faster your shutter speed should be. If you leave a longer shutter speed on a wide aperture, the chances are your image will be over exposed. Leting too much light into the camera, will over exposed an image. Wider apertures create a smaller depth of field, meaning less of the image will be in focus.
Alternatively, if you have a small aperture, you will need a longer shutter speed, to allow enough light into the camera to expose the image. Smaller apertures have a much largers depth of field, meaning most, if not all of the image will be in focus. These types of photos would require a tripod, and or shutter release, to ensure no camera shake, dew to the longer shutter speed.
Apertures are decribed as F stops. The larger the aperture the smaller the number. So F.5 would be a large aperture, with a small depth of field. F.22 would be a small aperture, with a large depth of field.

Thursday 28 January 2010

Mark Gray Landscape Photographer


Mark Gray is an Internationally recognised photographic artist. Completely self taught, he specialises in stunning panoramic photography of fine art landscapes from Australia and beyond.

I've been looking at the work of Mark Gray. I love the photographs on Marks web site. He mostly does panoramic photographs. He uses a ,medium format panoramic film camera, which allows him to take photos up five meters wide.
With no previous training he has managed to create a hugely successful photography business. From displaying a range of high quality panoramic photographs for sale, to offering private tuition, passing on his knowledge to other people.

This is the type of photography i hope to be doing in the future. I like the idea of travel photography. Getting to see the world is one of my dreams. Id love to be able to photograph these places for a living. The different cultures and landscapes, id very much like to be able to go to these places, and capture them on camera.
I realize Mark's work is not quite travel photography per-say, he doesn't capture the culture in his images, more the landscape. Its coincidence he lives in Australia. It just happens Australia is very high up on my list of places to go. Im planning on going in the next couple of years. If i am able to take even one photograph like Mark, then i will be very happy.

When i eventually get a tripod, i'm going to try and create a panoramic photograph. I have a vague idea of what i'm going to photograph. I'm just going to try around with different techniques, see what works.

Most if not all of Marks images are taken at sunset or sunrise. When the light is best for landscape photography.

Tuesday 26 January 2010

Sunset Photos


Im sitting at my computer, and i look up to see the sky changing colour, into pinks and orange's. The sun had just started to set. So i grab my camera a head down the street, to try and grab a few shots. I live near some pylons, so i had to get quite far down the road before i could take any photos, otherwise there would be a great big pylon in the way of the sunset.
I tryed to shoot in different modes. I first had the camera set to Auto, and was saving the photos as jpg's. These were coming out well, altho i wanted capture more of the colour in the photo. So i set the camera to save files to RAW, as i read that it helps when your editing photos later, because it dosnt process the photo in camera, whereas a jpg does. I didnt really notice anything different about the image being shown on my display.
I then put the camera into Aperture Priorty mode. I tryed using F.16, i didnt have a tripod with me, so it was harder to keep the camera steady, because the shutter was being left open longer. So i then put it on F.10. Which was ok, but i felt i was getting better results in Auto.
So not having anything to lean on nearby, i decided to put it back into Auto mode because the light was going fast.
These are some of the images i captured. The first three have been edited using Lightroom, mostly because i shot them in RAW, so they had to be converted into JPG's in order to upload them onto here. The last two were shot in JPG, and havent been edited in any way.

Monday 25 January 2010

Over Exposed


When i went out to take some photos yesterday, i tryed taking a shot of a river, with a longer shutter speed. I had it on a 2.6 second exposure. There was too much light getting into the sensor, so the image was very over exposed. I lowered the iso to 100, which was as far as it would go. I also sped up the shutter speed a little to a 1.3 second exposure, to try and stop the amount of light getting in, but it was still too over exposed. I was in a hurry to move on so i didnt stay and change some more settings. I had the camera in shutter speed priorty mode, so i had no control over the aperture. The aperture was set to F.16. I could have tryed lowering the aperture to F.22 in manual mode. I also should have tryed lowering the exposure meter in camera, down a few stops.
I realise these images are not the greatest composed shots. I was merly trying to see if i could create a dreamy type effct, with the water in the river. I have had better success with these types of shots earlier when i was on holiday. The light was better for the shutter speeds i was using (two second exposure).
I have posted the two over exposed shots, i took at the river, and the one i took on holiday, of a stream.

Sunday 24 January 2010

New Photographs


Today i went out to take some photos with my brother. He wanted some textures, and photos of certain buildings, for a concept art hes doing. I also wanted to go out and take some new landscape photos. I didnt get as many as i would have liked, because not long after we set out, it started to rain. I was worried that the camera might get damaged, so i only took it out a few times.
These are a few of the photos i took, which i have then edited in Lightroom. Most of the photos i have converted into black and white, because it wasnt the greatest of days, so i felt it looked better with the colour taken out.

Saturday 23 January 2010

Windam Hill Inn Photo Shoot


I went out to the states last year, to vist a friend of mine. He asked me to take a few shots of there flower arangements, around the inn where he worked. I never had a tripod to work with, so getting the photos i wanted was tricky, dew to the poor light in some areas. A lot of the time i rested the camera on a table top, or work surface to keep it steady.
He then showed them to one of the managers, who printed a few out to use on post cards. Which they then place in various rooms at the inn. These are a few of the ones i took. All have been editied in Lightroom.

Wednesday 20 January 2010

Charlie Waite


Charlie Waite is now widely revered internationally as the doyen of English landscape photographers. His distinctive style combining graphic finesse with an almost spiritual quality of calm and serenity is immediately recognisable.

With his legendary evangelical approach to the art, he has played a pivotal role in promoting the current worldwide renaissance of Landscape photography.

I love all the images Charlie Waite has posted on his site. He represents the different countries hes photographed so well. I think the composition of his shots work so well. Id like to include some of his techniques in my photography. His photos seem so simple and peaceful.

http://www.charliewaite.com/home.asp

Tuesday 19 January 2010

Another of my photos


I took this while i was trying out the manual focus on my camera. Its also been edited using a preset in Lightroom.

Monday 18 January 2010

Digital Photography School

Another site i use regulary is Digital Photography School. Its aimed more toward beginners, and they offer loads of tips on how to photograph certain things, using different techniques. They have there own forum, where other like minded people can chat, and show off some of there work. They often have a project going, where you try to photograph a certain subject or topic. Then post your photos for people to comment on.
They always have pro photographers who write articles each week.

http://digital-photography-school.com/tips

Photofocus


Photofocus is a one-stop online media site for serious amateur and emerging professional photographers interested in learning more about photography. The bulk of its posts are tips, tricks, news and reviews, aided by interviews with prominent photographers, educational screencasts and a very active community of engaged readers who regularly comment. Photofocus‘ mission is to motivate, educate, inform and entertain. expand to include interviews with prominent photographers and offer more educational screencasts. We have been covering photography at this URL since 1998.

(1.2)

I vist this site quite often. Its very handy to find hints and tips.

www.photofocus.com

Sunday 17 January 2010

Jump Rope


I just had to post this.

Anthony Weller - Architectural Photographer


While looking around Antony's web site, i dont feel particularly inspired by his photographs. Thats not to say they're bad. I can see they're very good images. I just feel that this isnt where i see myself. I find myself being drawn more towards landscape photography more, and more.

http://www.archimage.co.uk/arch_thumbnail.htm